GP_Puppet
A downloadable gp_puppet
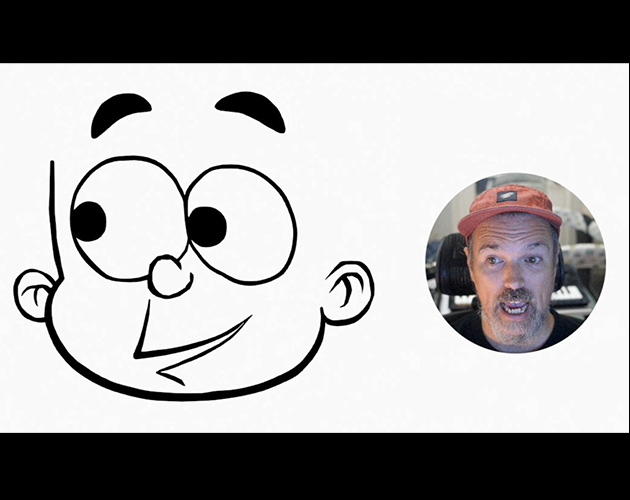
You’ve already seen 3D polygonal characters being driven by an iPhone. But I bet you haven’t seen that many Grease Pencil sketches in Blender puppeteered in the same way! So without further ado let me tell you how I built it.
Intro
In this first chapter I’m going to describe how I set up the mouth of the character. There are a few basic techniques that will be used in other areas, like the eyes and the eyebrows. However, I’m leaving those for the next chapter just so I give myself enough time to polish the technique before I tell you how to do it.

At the end of this guide you’ll find a link to the scene (in Blender 4.2 LTS; you might be able to use it in older versions) so you can open it, study it and create your own setups. I’ve learnt a lot doing that with scenes and projects from others, so feel free to take it and repurpose as much as you want. And please share your results with all of us!
What this document is
This document is an example of how you can deform and control a Grease Pencil object with different techniques. Under certain conditions they might not be the “most appropriate” ones: they might not be performant or they could cause scene instabilities. If you are planning to use this in production, check with your team and also save often! Remember that this is just a prototype made for fun, for learning and for sharing with you all.
It is also the first part in a series of several chapters. In the next one I’ll talk about eyes and eyebrows, and on the third one I’ll talk about refining the results.
What it is not
The guide is not intended to be a step by step tutorial. I think it’s more interesting sharing the scene with you and using this document to describe certain design decisions. But I’ll enumerate some steps as needed, and you should be able to reproduce those in your scene. If you have any question, please use the comments and I'll clarify and/or update this tutorial to capture as much explanations as needed.
It is not also intended to be taken as the only way to build a setup like this, as you’ll soon see!
The ingredients
Let’s start with what I used to assemble the scene above:
- Blender. I assembled the scene in Blender 4.2. You should be able to open it in older versions or reproduce these behaviors in older versions as well. I did some work in 4.1, but I did not test further than that.
- An iOS device with a TrueDepth camera, which means you'll need an iPhone X or newer or iPad Pro in any of its versions and flavors. For this and other setups I’ve been using an iPhone 12 Mini.
- Live Link Face app. This is a great little app from Epic. It allows you to record and stream ARKit Blendshape values from your phone's frontal camera to your computer. If you are not familiar with ARKit Blendshapes, what happens under the hood is that your front camera recognizes 52 face expressions: opening the jaw, blinking, raising your eyebrows, sticking your tongue out, etc, and assigns each of them a value between 0.0 and 1.0. These face expression values (or signals) are the ones that I did connect to the Grease Pencil sketch so it can mimic my face.
- The addon. I’m using Nick Fishers’s Blender LiveLinkFace addon for its simplicity and efficiency: it allows Blender to receive streaming and prerecorded data from LiveLinkFace. Set a couple of attributes in LiveLinkFace, then do the same in Blender, connect them, and voila: your phone will be streaming the values straight to your scene. As of today, there’s a free version available.

Make sure to check the add-on instructions to install and configure it. For this prototype I’m using version 0.0.5. It does not allow you to record the performance in Blender, only to stream it, but that's exactly what I need. The latest one as of today (0.2.0) does allow you to record, which is great if you are planning to use this setup to capture your motion.
IMPORTANT!!! Both your phone and your computer must be on the same Wi-Fi network, and they must “see” each other. I didn't have any issues when running the setup at home, but it did not work at the office or at Starbucks, due to their Wi-Fi configuration.
Live Link Face app + Nick’s addon is not the only way you can make Blender “capture” those ARKit Blendshape values from your phone. In the past I’ve used Face Cap and iFacialMocap with similar results. iFacialMocap in particular also comes with its own computer client that sits in between your phone and Blender (and other DCCs as well, like Maya), and gives you some additional options to control the range, strength and distribution of the incoming ARKit signals.
However, I prefer Nick's add-on for its simplicity.
The Magic
If you have all of the above and you have followed the instructions in the add-on to install it correctly, you are ready for this step.
In my scene I have different Grease Pencil objects, corresponding to different face features and actions:
- opening the mouth and the jaw, narrowing and widening the lips. These are available in the .blend file for this Chapter.
- blinking, eyebrows and eye gaze, which will be covered eventually in Chapter 2.
They use different techniques to showcase how versatile Blender is to deforming Grease Pencil strokes. But all of them use the ARKit Blendshapes signals coming from the iPhone to control those deformations.
I’m using the default cube to hold all of those ARKit signals coming to Blender , because I want a “centralized” way where I can see all of those in one glance. The cube acts as a “funnel” that passes values along. Even though it’s not strictly necessary, having all of the incoming ARKit data is great for debugging.
I added several empty shape keys on the Cube, and I named them following the ARKit specification. When I hit CONNECT in the LiveLinkFace panel I saw the values in those shape keys going up and down as I gestured in front of my phone camera. Make sure you name the shape keys following their ARKit names: jawOpen will create the connection, but jawopen or jaw_open or myCharacter_jawOpen will not.
Newer versions of the Blender LiveLinkFace add-on come with name remapping tools, so there are less restrictions for naming your shape keys.
If you want a better visual of the shape keys values changing in real time, you can edit each shape key slightly by moving one or two vertices. It’s useful to debug the connections without having to select the cube and display the shape keys values at all the time.

Animating the Open Jaw
I started with an initial drawing of the mouth closed at frame 0. This is the rest pose. All the parts have their rest pose in this frame.
Then I drew an open mouth at frame 5. I ended up using a different number of strokes than in frame 0. If you reuse and tweak your strokes using Edit Mode and/or Sculpt Mode without changing the number of vertices, you can use the Interpolate tool to create the different in-betweens while blending them between both extremes. It’s pretty cool and it’ll allow you to have a smooth animation really quickly.

Having two different drawings was enough for me to puppeteer the character, and when you create your own setup I advise you to start with just these two extremes and make the connections to your phone. Once you see it in movement you’ll want to keep refining the animation, but at least you know your end-to-end setup is working before you invest too much time animating.
After testing that, I added a couple more drawings on subsequent frames for the mouth animation to look smoother.
It’s in this step where you might want to decide how to play with the timing and the spacing of the poses to get certain effects, like acceleration, smearing, etc. I decided to keep the transitions very linear and “boring”, because Blender gives us another tool where we can tweak this a little bit. More on that in next chapters!
Driving the Open Jaw
Once I had a rough animation that I liked (remember: it can be refined later), I added a TimeOffset modifier to the Grease Pencil object, and I set it to Fixed Frame. This is the key of this setup: it will allow you to control which frame of the Grease Pencil object animation you are displaying, independently from the current active frame in your Timeline. It’s a timeline within a timeline!
For example, doing this allowed me to add a subtle Noise modifier to get the wiggly line without clashing with how we control each face feature. As far as I know, this might not be possible in the version 0.2.0 of LiveLinkFace add-on. But I’m in conversations with Nick to see if there’s something that can be done about it.

The next step was to use the jawOpen shape key value from the cube as a driver of the Time Offset / Frame value; there are plenty of tutorials out there on how to do this, so I won’t describe it here. This created an initial connection but I needed to make further tweaks, so I opened and pinned the Drivers editor to my layout because I was going to use it extensively.
The Drivers editor has 3 main parts:
- on the left, you have the properties you want to drive.
- on the right panel, you have the attributes/inputs that you are using to drive,
- and on the center you have the animation curve that establishes how one relates to the other.
Just a couple of fields under “Add Input Variable” you'll find the property type that will drive Time Offset / Frame. Choose “Key”, and on the field next to it choose the one that holds the Cube shape keys. After that, use the path I provide (key_blocks[“jawOpen”].value) to point towards the specific shape that will do the driving.
This is how it should look after the operations I’ve described:

There’s just one more thing: the jawOpen ARKit signal goes from 0.0 to 1.0, and the range of my jaw opening animation goes from frame 0 to frame 5. So if the expression is “shape” my character will never be able to fully open the jaw with this setup. To fix that, I added a simple math expressions, shape * 5, which will play the full range of opening the jaw. If your animation is 20 frames long, you'll need to use shape * 20.
However, because some ARKit signals in LiveLinkApp don’t hit 1.0 (this is quite normal), I decided to use shape * 8 to make sure the extreme drawing for my jaw open is displayed. It’s a very simple connection, but it works. And I did the same for the jaw line so it moves with the mouth as well.
In the next chapter we’ll see some more complex expressions to drive the eyes and the eyebrows.
Lips wide/narrow
For this I decided to use a different technique to avoid complicating my lips setup too much. When rigging a character I often recommend isolating deformations and behaviors, working on them separately, and stacking them in a way where they could be tweaked independently rather than everything happening at the same level.
So I ended up using a lattice. A lattice is a great way to deform any object, including Grease Pencil strokes! After adding it to the scene and placing it correctly around the mouth, I created 2 shape keys: one for wide lips and another one to sculpt a narrow mouth. I did a lot of back and forth until I was happy with the poses and the transitions from one to the other!

When it comes to control, mouthSmileLeft (or Right, or even a combination of both) and mouthPucker were connected to the wide and narrow shape keys respectively. In this case, the connection is 1 to 1 and I didn’t need to use any multipliers to ensure a proper deformation.
But after further testing, I didn’t like how smooth and "computery" the transition from smile to narrow was. I enjoy that rough feeling of opening the mouth in just a handful of frames. So I ended up crafting an expression that creates discrete jumps of 0.2 on the lattice shape keys instead of a continuous blending from 0 to 1. This brings these transitions closer to how the jaw opens or the eyes blink, which is what I was looking for.
The expression I used is min(floor(var*10) / 5, 1), being var the mouthPucker value for narrow, and mouthSmileLeft for wide, as you'll see in the file.
Outro
This is just the beginning of our journey into puppeteering Grease Pencil characters with an iPhone! I've covered the basics of mouth animation, but there's so much more to explore.
In the next chapter, I'll talk about bringing eyes and eyebrows to life. And don't forget to download the scene file and experiment with it. I can't wait to see what you'll create!
Download
Leave a comment
Log in with itch.io to leave a comment.